Ubuntu 18.04.4的安装步骤
这几天折腾NUC主机,在安装Ubuntu 18.04.4 LTS(长期支持的稳定版本)的过程中遇到不少坑,立此存照吧。
Step 0:安装前的准备工作
已安装内存和硬盘的NUC主机之外,还需要:
独立显示器:感谢LP赞助的DELL S2319SP
USB键盘 + USB鼠标:开机BIOS设置硬件启动顺序时键盘操作不方便
有线网络接口:备用先不接
Ubuntu启动U盘:制作方法参见如何制作Ubuntu的USB启动盘,Server版本912M,Desktop版本2.13G
Step 1: 安装Ubuntu Server
插入Ubuntu安装U盘,开机启动后进入安装界面,各种参数选默认
完成安装后拔出U盘,重新启动并登录进入新安装的Ubuntu Server
开机启动过程中,可能需要在BIOS设置启动顺序(USB—STAT—LAN),进入方法是加电过程中持续按F2
强烈建议安装Openssh Server,以后可以拔掉键盘和鼠标,直接远程登录管理主机
安装过程中需要设置一个默认用户,root尚未激活
由于安装过程中未接网线,完成后所有网络接口都不可用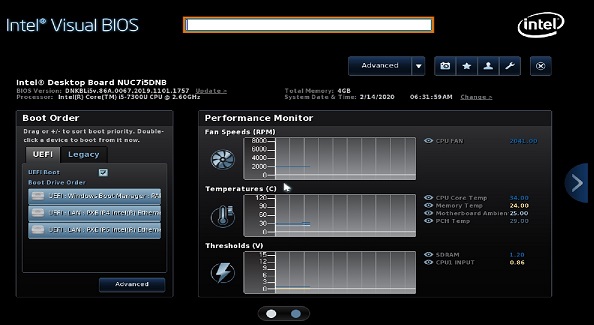
step 2: 激活root用户
以默认用户身份设置root口令,并切换到root
1
2
3
4
5
6
7
8
9
10
sj@nuc5i3:~$ sudo passwd root
[sudo] password for sj:
Enter new UNIX password:
Retype new UNIX password:
passwd: password updated successfully
sj@nuc5i3:~$ su -
Password:
root@nuc5i3:~#如果需要允许root用户远程登录,修改配置文件
/etc/ssh/sshd_config,将PermitRootLogin改为yes1
#PermitRootLogin prohibit-password
Step 3: 设置有线网络接入
插入有线网络,没啥动静? 别着急,还没配置网络参数呢!
编辑网卡配置文件
/etc/netplan/50-cloud-init.yaml,至少需要设置IP地址和默认网关1
2
3
4
5
6
7
8
9
10
11
12
13# This file is generated from information provided by the datasource. Changes
# to it will not persist across an instance reboot. To disable cloud-init's
# network configuration capabilities, write a file
# /etc/cloud/cloud.cfg.d/99-disable-network-config.cfg with the following:
# network: {config: disabled}
network:
version: 2
ethernets:
enp0s25:
dhcp4: no
addresses: [192.168.0.130/24]
gateway4: 192.168.0.1使用
netpaln generate刷新网络配置,netplan apply启动有线网卡
最后用ifconfig检查网络状态,确认有线网卡enp0s25启动成功1
2
3
4
5
6
7
8
9
10
11
12
13
14
15
16
17
18
19
20
21
22root@nuc5i3:/etc/netplan# netplan generate
root@nuc5i3:/etc/netplan# netplan apply
root@nuc5i3:/etc/netplan# ifconfig
enp0s25: flags=4163<UP,BROADCAST,RUNNING,MULTICAST> mtu 1500
inet 192.168.0.130 netmask 255.255.255.0 broadcast 192.168.0.255
inet6 fe80::baae:edff:fe73:87fb prefixlen 64 scopeid 0x20<link>
ether b8:ae:ed:73:87:fb txqueuelen 1000 (Ethernet)
RX packets 23068 bytes 14045959 (14.0 MB)
RX errors 0 dropped 23 overruns 0 frame 0
TX packets 12173 bytes 1273580 (1.2 MB)
TX errors 0 dropped 0 overruns 0 carrier 0 collisions 0
device interrupt 20 memory 0xf7100000-f7120000
lo: flags=73<UP,LOOPBACK,RUNNING> mtu 65536
inet 127.0.0.1 netmask 255.0.0.0
inet6 ::1 prefixlen 128 scopeid 0x10<host>
loop txqueuelen 1000 (Local Loopback)
RX packets 144 bytes 13680 (13.6 KB)
RX errors 0 dropped 0 overruns 0 frame 0
TX packets 144 bytes 13680 (13.6 KB)
TX errors 0 dropped 0 overruns 0 carrier 0 collisions 0
Step 4: 设置DNS服务
在基本安装完成后,默认DNS指向的是
127.0.0.53:53,无法解析公网域名!!!
解决办法:停止并禁用系统默认的DNS服务systemd-resolved,并删除/etc/resolv.conf软连接1
2
3
4
5
6
7
8
9
10
11
12
13
14
15
16
17
18
19
20
21
22
23
24
25
26root@nuc5i3:~# ping t.cn
ping: t.cn: Temporary failure in name resolution
root@nuc5i3:~# netstat -tunpl
Active Internet connections (only servers)
Proto Recv-Q Send-Q Local Address Foreign Address State PID/Program name
tcp 0 0 127.0.0.53:53 0.0.0.0:* LISTEN 1001/systemd-resolv
tcp 0 0 0.0.0.0:22 0.0.0.0:* LISTEN 2012/sshd
tcp6 0 0 :::22 :::* LISTEN 2012/sshd
udp 0 0 127.0.0.53:53 0.0.0.0:* 1001/systemd-resolv
root@nuc5i3:~# systemctl stop systemd-resolved
root@nuc5i3:~# systemctl disable systemd-resolved
root@nuc5i3:~# systemctl status systemd-resolved
● systemd-resolved.service - Network Name Resolution
Loaded: loaded (/lib/systemd/system/systemd-resolved.service; disabled; vendor preset: enabled)
Active: inactive (dead)
Docs: man:systemd-resolved.service(8)
https://www.freedesktop.org/wiki/Software/systemd/resolved
https://www.freedesktop.org/wiki/Software/systemd/writing-network-configuration-managers
https://www.freedesktop.org/wiki/Software/systemd/writing-resolver-clients
root@nuc5i3:/# ls -l /etc/resolv.conf
lrwxrwxrwx 1 root root 39 Feb 3 18:22 /etc/resolv.conf -> ../run/systemd/resolve/stub-resolv.conf
root@nuc5i3:/# rm /etc/resolv.conf重新创建文件
/etc/resolv.conf,并写入自定义的nameserver1
2
3root@nuc5i3:~# cat /etc/resolv.conf
nameserver 192.168.0.1
nameserver 8.8.8.8简单用
dig测试一下,DNS现在正常工作了。1
2
3
4
5
6
7
8
9
10
11
12
13
14
15
16
17
18
19
20root@nuc5i3:~# dig t.cn
; <<>> DiG 9.11.3-1ubuntu1.11-Ubuntu <<>> t.cn
;; global options: +cmd
;; Got answer:
;; ->>HEADER<<- opcode: QUERY, status: NOERROR, id: 22813
;; flags: qr rd ra; QUERY: 1, ANSWER: 1, AUTHORITY: 0, ADDITIONAL: 1
;; OPT PSEUDOSECTION:
; EDNS: version: 0, flags:; udp: 512
;; QUESTION SECTION:
;t.cn. IN A
;; ANSWER SECTION:
t.cn. 59 IN A 116.211.169.137
;; Query time: 197 msec
;; SERVER: 8.8.8.8#53(8.8.8.8)
;; WHEN: Sat Jun 20 13:05:06 UTC 2020
;; MSG SIZE rcvd: 49
Step 5: 设置Wifi网络接入(可选)
在确认已连接公网、且DNS正常工作的前提下,在线安装
network-manager(其中包括了无线网卡驱动程序等必需的软件包)1
2apt update
apt install network-manager注意:如果有线网卡没有配置nameserver,而且缺少上一步强行设置nameserver的情况下,由于不能正确解析公网域名,apt无法工作!!!
再次编辑
/etc/netplan/50-cloud-init.yaml,至少需要配置Access-points的SSID和接入密码等。
注意:必须显示定义渲染方式为NetworkManager,这也是上一步需要apt安装的原因。1
2
3
4
5
6
7
8
9
10
11
12
13
14
15
16
17
18
19
20
21
22
23# This file is generated from information provided by the datasource. Changes
# to it will not persist across an instance reboot. To disable cloud-init's
# network configuration capabilities, write a file
# /etc/cloud/cloud.cfg.d/99-disable-network-config.cfg with the following:
# network: {config: disabled}
network:
version: 2
renderer: NetworkManager
ethernets:
enp0s25:
dhcp4: no
addresses: [192.168.0.130/24]
gateway4: 192.168.0.1
wifis:
wlp2s0:
access-points:
"NETGEAR59":
password: "xxxxxxxx"
dhcp4: no
addresses: [192.168.0.131/24]
gateway4: 192.168.0.1再次
netplan generate检查并刷新网络配置,netplan apply启动无线网卡。
检查网络状态,ifconfig确认无线网卡wlp2s0启动成功
注意:netplan有中间配置文件的刷新机制,generate + apply是一个良好的操作习惯。1
2
3
4
5
6
7
8
9
10
11
12root@nuc5i3:/etc/netplan# netplan generate
root@nuc5i3:/etc/netplan# netplan apply
root@nuc5i3:/etc# ifconfig
......
wlp2s0: flags=4163<UP,BROADCAST,RUNNING,MULTICAST> mtu 1500
inet 192.168.0.131 netmask 255.255.255.0 broadcast 192.168.0.255
inet6 fe80::3613:e8ff:fe25:20d8 prefixlen 64 scopeid 0x20<link>
ether 34:13:e8:25:20:d8 txqueuelen 1000 (Ethernet)
RX packets 501 bytes 94281 (94.2 KB)
RX errors 0 dropped 0 overruns 0 frame 0
TX packets 44 bytes 4436 (4.4 KB)
TX errors 0 dropped 0 overruns 0 carrier 0 collisions 0
附录: 如何查看网卡的逻辑设备名
不同型号的硬件设备,由于其驱动程序的差异,在Ubuntu安装完成后会有不同的设备名。
使用lshw命令,可以查询全部硬件设备信息,并找到其逻辑设备名。
1 | lshw |
还有一个办法,就是命令ip a查看网卡的简要信息。
1 | root@nuc5i3:~# ip a |