OpenVPN 安装笔记

OpenVPN 是一种开源的 VPN 软件应用程序,它允许远程访问或连接到私有网络,其关键特点和功能包括:

  • 支持多种加密算法,包括 AES、DES、3DES 等
  • 支持多种网络协议,如 UDP 和 TCP
  • 支持多种认证方式,包括预共享密钥、证书、用户名和密码
  • 支持多种操作系统,包括 Windows、Linux、macOS、Android 和 iOS 等,并提供 GUI 工具帮助用户更方便地配置和管理

Easy-RSA 是一个用于管理 X.509 PKI(公钥基础设施)的工具,主要用于生成和管理数字证书。它提供了创建证书颁发机构(CA)、生成服务器和客户端证书、管理证书注销列表(CRL)等功能。
Easy-RSA 通过脚本封装了 OpenSSL 的复杂命令,使得证书的生成和管理过程更加简单和自动化。例如,使用 Easy-RSA 可以通过简单的命令来初始化 PKI 目录、生成 CA 证书、生成服务器和客户端证书等

一、服务器环境准备

选择一台有公网地址的服务器,本次安装的操作系统为 CentOS 9 Stream x64。

1. 网络配置和内核参数优化

1
2
3
4
5
6
7
8
9
10
11
12
13
14
15
16
17
18
19
# 关闭防火墙
systemctl stop firewalld
systemctl disable firewalld
systemctl status firewalld

# 关闭Selinux
sed -i 's/enforcing/disabled/' /etc/selinux/config
setenforce 0

# 内核参数优化
echo 'net.core.default_qdisc = fq' >> /etc/sysctl.conf
echo 'net.core.somaxconn = 21644' >> /etc/sysctl.conf
echo 'net.ipv4.conf.default.rp_filter = 0' >> /etc/sysctl.conf
echo 'net.ipv4.ip_forward = 1' >> /etc/sysctl.conf
echo 'net.ipv4.tcp_congestion_control = bbr' >> /etc/sysctl.conf
echo 'net.ipv4.tcp_fastopen = 3' >> /etc/sysctl.conf
echo 'net.netfilter.nf_conntrack_max = 1048576' >> /etc/sysctl.conf

sysctl -p

2. 下载软件包

当前版本:openvpn 2.6.2 + easy-rsa 3.1.6

1
2
3
4
5
6
7
8
# 安装依赖包
yum -y install gcc lzo-devel pam-devel
epel-release
yum -y install easy-rsa libnl3-devel libcap-ng-devel openssl-devel lz4-devel

# 下载源代码
wget https://swupdate.openvpn.org/community/releases/openvpn-2.6.2.tar.gz
tar -xvf openvpn-2.6.2.tar.gz

二、编译 openvpn

1
2
3
4
5
6
7
8
9
10
11
# 编译二进制文件,安装目录:/usr/local/openvpn
cd openvpn-2.6.2
./configure --prefix=/usr/local/openvpn --disable-dco
make && make install

# 设置 PATH 环境变量
echo -e "PATH=\$PATH:/usr/local/openvpn/sbin" > /etc/profile.d/openvpn256.sh
source /etc/profile

# 检查openvpn 版本信息
openvpn --version

编译成功后,应正确输出版本信息:

1
2
3
4
5
OpenVPN 2.6.2 x86_64-pc-linux-gnu [SSL (OpenSSL)] [LZO] [LZ4] [EPOLL] [MH/PKTINFO] [AEAD]
library versions: OpenSSL 3.2.2 4 Jun 2024, LZO 2.10
Originally developed by James Yonan
Copyright (C) 2002-2023 OpenVPN Inc <sales@openvpn.net>
Compile time defines: enable_async_push=no enable_comp_stub=no enable_crypto_ofb_cfb=yes enable_dco=no enable_debug=yes enable_dlopen=unknown enable_dlopen_self=unknown enable_dlopen_self_static=unknown enable_fast_install=yes enable_fragment=yes enable_iproute2=no enable_libtool_lock=yes enable_lz4=yes enable_lzo=yes enable_management=yes enable_pam_dlopen=no enable_pedantic=no enable_pkcs11=no enable_plugin_auth_pam=yes enable_plugin_down_root=yes enable_plugins=yes enable_port_share=yes enable_selinux=no enable_shared=yes enable_shared_with_static_runtimes=no enable_small=no enable_static=yes enable_strict=no enable_strict_options=no enable_systemd=no enable_werror=no enable_win32_dll=yes enable_wolfssl_options_h=yes enable_x509_alt_username=no with_aix_soname=aix with_crypto_library=openssl with_gnu_ld=yes with_mem_check=no with_openssl_engine=auto with_sysroot=no

三、证书制作

1. 环境准备

前面安装的 easy-rsa 位于 /usr/share/easy-rsa,可能有多个版本的目录。
当前版本是 3.1.6,复制代码到 openvpn 的安装目录,便于后续制作证书。

1
2
3
4
5
6
7
8
9
# 拷贝软件包
cp -r /usr/share/easy-rsa/3.1.6/ /usr/local/openvpn/easy-rsa

# 拷贝配置文件
cp /usr/share/doc/easy-rsa/vars.example /usr/local/openvpn/easy-rsa/vars

# 初始化
cd /usr/local/openvpn/easy-rsa
./easyrsa init-pki

初始化成功后,可以看到如下输出信息:

1
2
3
4
5
6
7
8
9
10
11
12
13
14
Notice
------
'init-pki' complete; you may now create a CA or requests.

Your newly created PKI dir is:
* /usr/local/openvpn/easy-rsa/pki

Using Easy-RSA configuration:
* /usr/local/openvpn/easy-rsa/vars

IMPORTANT:
The preferred location for 'vars' is within the PKI folder.
To silence this message move your 'vars' file to your PKI
or declare your 'vars' file with option: --vars=<FILE>

2. 创建 CA 证书

以 自定义 CA 的名义,为 caogo 颁布 CA 证书,无密码登录方式。

1
./easyrsa build-ca nopass

处理结果:

  • CA 证书文件:/usr/local/openvpn/easy-rsa/pki/ca.crt
  • CA 私钥文件:/usr/local/openvpn/easy-rsa/pki/issued/ca.key
1
2
3
4
5
6
7
8
9
10
11
12
13
14
15
16
17
18
19
20
21
22
23
24
25
Using Easy-RSA 'vars' configuration:
* /usr/local/openvpn/easy-rsa/vars

IMPORTANT:
The preferred location for 'vars' is within the PKI folder.
To silence this message move your 'vars' file to your PKI
or declare your 'vars' file with option: --vars=<FILE>

Using SSL:
* openssl OpenSSL 3.2.2 4 Jun 2024 (Library: OpenSSL 3.2.2 4 Jun 2024)
...+.....+.........+...+.+..+.......+......+..+.......+...+...+.....+.......+..+.......+.....+.+........+.+...+.....+...+.........+.+...++++++
-----
You are about to be asked to enter information that will be incorporated
into your certificate request.
What you are about to enter is what is called a Distinguished Name or a DN.
There are quite a few fields but you can leave some blank
For some fields there will be a default value,
If you enter '.', the field will be left blank.
-----
Common Name (eg: your user, host, or server name) [Easy-RSA CA]:caogo

Notice
------
CA creation complete. Your new CA certificate is at:
* /usr/local/openvpn/easy-rsa/pki/ca.crt

3. 生成 Server 证书

为 Server 创建非对称密钥对,并使用 caogo 的 CA 证书 为公钥签名。

1
./easyrsa build-server-full caogo nopass

处理结果:

  • 服务器证书文件:/usr/local/openvpn/easy-rsa/pki/issued/caogo.crt
  • 服务器私钥文件:/usr/local/openvpn/easy-rsa/pki/private/caogo.key
1
2
3
4
5
6
7
8
9
10
11
12
13
14
15
16
17
18
19
20
21
22
23
24
25
26
27
28
29
30
31
32
33
34
35
36
37
38
39
40
41
42
43
44
45
46
47
48
49
Using Easy-RSA 'vars' configuration:
* /usr/local/openvpn/easy-rsa/vars

IMPORTANT:
The preferred location for 'vars' is within the PKI folder.
To silence this message move your 'vars' file to your PKI
or declare your 'vars' file with option: --vars=<FILE>

Using SSL:
* openssl OpenSSL 3.2.2 4 Jun 2024 (Library: OpenSSL 3.2.2 4 Jun 2024)
.........+...+.....+.............+..+...+.......+++++++++++++++++++++++++++++++++++++++*..+.+......+........+..........++++++
-----

Notice
------
Private-Key and Public-Certificate-Request files created.
Your files are:
* req: /usr/local/openvpn/easy-rsa/pki/reqs/caogo.req
* key: /usr/local/openvpn/easy-rsa/pki/private/caogo.key

You are about to sign the following certificate:
Request subject, to be signed as a server certificate
for '825' days:

subject=
commonName = caogo

Type the word 'yes' to continue, or any other input to abort.
Confirm request details: yes

Using configuration from /usr/local/openvpn/easy-rsa/pki/openssl-easyrsa.cnf
Check that the request matches the signature
Signature ok
The Subject's Distinguished Name is as follows
commonName :ASN.1 12:'caogo'
Certificate is to be certified until Apr 9 10:05:01 2027 GMT (825 days)

Write out database with 1 new entries
Database updated

Notice
------
Certificate created at:
* /usr/local/openvpn/easy-rsa/pki/issued/caogo.crt

Notice
------
Inline file created:
* /usr/local/openvpn/easy-rsa/pki/inline/caogo.inline

4. 制作 Client 证书

对于一个 Server 可以为不同用户分别制作 Client 证书。
注意,你可以将一份证书提供给多人,他们可以同时使用 VPN,但无法相互连通(IP地址相同)。
当然,OpenVPN 也可以将 MySQL 作为后端,提供大量用户的证书管理功能,这里就不介绍了!

创建 x-client 用户

为 x 用户创建客户端证书,名字就是 x-client,未设密码。
对于不同用户,可以再来一个 y-client,或者 z-client。

1
./easyrsa gen-req x-client nopass

处理结果:

  • Client 私钥文件:/usr/local/openvpn/easy-rsa/pki/private/x-client.key
  • Client 中间文件:/usr/local/openvpn/easy-rsa/pki/reqs/x-client.req
1
2
3
4
5
6
7
8
9
10
11
12
13
14
15
16
17
18
19
20
21
22
23
24
25
26
27
Using Easy-RSA 'vars' configuration:
* /usr/local/openvpn/easy-rsa/vars

IMPORTANT:
The preferred location for 'vars' is within the PKI folder.
To silence this message move your 'vars' file to your PKI
or declare your 'vars' file with option: --vars=<FILE>

Using SSL:
* openssl OpenSSL 3.2.2 4 Jun 2024 (Library: OpenSSL 3.2.2 4 Jun 2024)
.+...................+++++++++++++++++++++++++++++++++++++++*.+......+......+......+.......+..+....+.....+....+..+...+.......+.........+..+...+.+.........+..+....+...+..+.+...
-----
You are about to be asked to enter information that will be incorporated
into your certificate request.
What you are about to enter is what is called a Distinguished Name or a DN.
There are quite a few fields but you can leave some blank
For some fields there will be a default value,
If you enter '.', the field will be left blank.
-----
Common Name (eg: your user, host, or server name) [x-client]:x

Notice
------
Private-Key and Public-Certificate-Request files created.
Your files are:
* req: /usr/local/openvpn/easy-rsa/pki/reqs/x-client.req
* key: /usr/local/openvpn/easy-rsa/pki/private/x-client.key

制作 x-client 证书

使用 caogo 的 CA 证书为 x-client 的公钥文件签名。

1
./easyrsa sign client  x-client

处理结果:

  • Client 签名证书:/usr/local/openvpn/easy-rsa/pki/issued/x-client.crt
1
2
3
4
5
6
7
8
9
10
11
12
13
14
15
16
17
18
19
20
21
22
23
24
25
26
27
28
29
30
31
32
33
34
35
36
37
Using Easy-RSA 'vars' configuration:
* /usr/local/openvpn/easy-rsa/vars

IMPORTANT:
The preferred location for 'vars' is within the PKI folder.
To silence this message move your 'vars' file to your PKI
or declare your 'vars' file with option: --vars=<FILE>

Using SSL:
* openssl OpenSSL 3.2.2 4 Jun 2024 (Library: OpenSSL 3.2.2 4 Jun 2024)
You are about to sign the following certificate:
Please check over the details shown below for accuracy. Note that this request
has not been cryptographically verified. Please be sure it came from a trusted
source or that you have verified the request checksum with the sender.
Request subject, to be signed as a client certificate
for '825' days:

subject=
commonName = x

Type the word 'yes' to continue, or any other input to abort.
Confirm request details: yes

Using configuration from /usr/local/openvpn/easy-rsa/pki/openssl-easyrsa.cnf
Check that the request matches the signature
Signature ok
The Subject's Distinguished Name is as follows
commonName :ASN.1 12:'x'
Certificate is to be certified until Apr 9 11:21:39 2027 GMT (825 days)

Write out database with 1 new entries
Database updated

Notice
------
Certificate created at:
* /usr/local/openvpn/easy-rsa/pki/issued/x-client.crt

创建 y-client 用户 & 证书签名

1
2
./easyrsa gen-req y-client nopass
./easyrsa sign client y-client

5. 生成 Diffie-Hellman 文件

Diffie-Hellman (DH) 是一种密钥交换协议,用于在不安全的通信渠道上安全地交换密钥。
dh.pem 文件的主要信息是用于用于模运算的大素数 $p$ 和 生成元 $g$。

1
./easyrsa gen-dh

处理结果:

  • DH 文件:/usr/local/openvpn/easy-rsa/pki/dh.pem,输出信息如下:
1
2
3
4
5
6
7
8
9
10
11
12
13
14
15
16
17
18
19
Using Easy-RSA 'vars' configuration:
* /usr/local/openvpn/easy-rsa/vars

IMPORTANT:
The preferred location for 'vars' is within the PKI folder.
To silence this message move your 'vars' file to your PKI
or declare your 'vars' file with option: --vars=<FILE>

Using SSL:
* openssl OpenSSL 3.2.2 4 Jun 2024 (Library: OpenSSL 3.2.2 4 Jun 2024)
Generating DH parameters, 2048 bit long safe prime
..............................................................................................++*++*++*++*++*++*++*++*++*++*++*++*++*++*++*++*++*++*++*++*++*
DH parameters appear to be ok.

Notice
------

DH parameters of size 2048 created at:
* /usr/local/openvpn/easy-rsa/pki/dh.pem

四、启动 Server

1. 收集 Sever 证书文件

1
2
3
4
5
6
7
8
mkdir /etc/openvpn
mkdir /etc/openvpn/server
mkdir /var/log/openvpn

cp pki/ca.crt /etc/openvpn/server/
cp pki/issued/caogo.crt /etc/openvpn/server/
cp pki/private/caogo.key /etc/openvpn/server/
cp pki/dh.pem /etc/openvpn/server/

2. 生成 TA 验证文件

在 OpenVPN 中,ta.key(tls-auth) 是一个密钥文件,用于 HMAC 签名和验证,以提供额外的安全层,防止重放攻击和中间人攻击。这个密钥文件由 EasyRSA 工具生成,并在 OpenVPN 的配置文件中被引用。

1
openvpn --genkey secret /etc/openvpn/server/ta.key

3. 编辑 Server 配置文件

定义 Server 位于:/etc/openvpn/server.conf,详细参数为:

1
2
3
4
5
6
7
8
9
10
11
12
13
14
15
16
17
18
19
20
21
22
23
24
25
26
27
28
29
30
31
32
33
34
35
36
# 基础配置
port 1194
proto udp
dev tun

# 配置 DHCP 信息
server 10.8.0.0 255.255.255.0

# 向客户端推送路由数据
push "route 10.8.0.0 255.255.255.0"

client-to-client # 允许客户端之间通信
duplicate-cn # 允许统一客户端证书多人共用

# 密钥和证书文件信息
ca /etc/openvpn/server/ca.crt
cert /etc/openvpn/server/caogo.crt
key /etc/openvpn/server/caogo.key
dh /etc/openvpn/server/dh.pem

# 要求使用 tls-auth 密钥
tls-auth /etc/openvpn/server/ta.key 0

# 参数设定
cipher AES-256-CBC # 设定数据传输的加密模式
persist-key # 持久化存储,用于重启恢复
persist-tun
keepalive 10 120
ifconfig-pool-persist ipp.txt # 客户端重新连接时,可以继续使用上次的 IP 地址
explicit-exit-notify 1 # 服务器重启时,客户端可以自动重连,仅限 UDP 协议

# 日志级别和路径
verb 3
; status openvpn-status.log
; log /var/log/openvpn/server.log
; log-append /var/log/openvpn/server.log

前台启动 openvpn,结果如下:

1
2
3
4
5
6
7
8
9
10
11
12
13
14
15
16
17
18
19
20
21
22
23
24
25
26
27
28
[root@vultr openvpn]# openvpn --config /etc/openvpn/server.conf
2025-01-04 10:51:42 WARNING: --topology net30 support for server configs with IPv4 pools will be removed in a future release. Please migrate to --topology subnet as soon as possible.
2025-01-04 10:51:42 DEPRECATED OPTION: --cipher set to 'AES-256-CBC' but missing in --data-ciphers (AES-256-GCM:AES-128-GCM:CHACHA20-POLY1305). OpenVPN ignores --cipher for cipher negotiations.
2025-01-04 10:51:42 NOTICE: --explicit-exit-notify ignored for --proto tcp
2025-01-04 10:51:42 OpenVPN 2.6.2 x86_64-pc-linux-gnu [SSL (OpenSSL)] [LZO] [LZ4] [EPOLL] [MH/PKTINFO] [AEAD]
2025-01-04 10:51:42 library versions: OpenSSL 3.2.2 4 Jun 2024, LZO 2.10
2025-01-04 10:51:42 net_route_v4_best_gw query: dst 0.0.0.0
2025-01-04 10:51:42 net_route_v4_best_gw result: via 155.138.220.1 dev enp1s0
2025-01-04 10:51:42 Diffie-Hellman initialized with 2048 bit key
2025-01-04 10:51:42 CRL: loaded 1 CRLs from file /usr/local/openvpn/ssl/crl.pem
2025-01-04 10:51:42 net_route_v4_best_gw query: dst 0.0.0.0
2025-01-04 10:51:42 net_route_v4_best_gw result: via 155.138.220.1 dev enp1s0
2025-01-04 10:51:42 ROUTE_GATEWAY 155.138.220.1/255.255.254.0 IFACE=enp1s0 HWADDR=56:00:05:3b:22:a2
2025-01-04 10:51:42 TUN/TAP device tun0 opened
2025-01-04 10:51:42 net_iface_mtu_set: mtu 1500 for tun0
2025-01-04 10:51:42 net_iface_up: set tun0 up
2025-01-04 10:51:42 net_addr_ptp_v4_add: 10.8.0.1 peer 10.8.0.2 dev tun0
2025-01-04 10:51:42 net_route_v4_add: 10.8.0.0/24 via 10.8.0.2 dev [NULL] table 0 metric -1
2025-01-04 10:51:42 Could not determine IPv4/IPv6 protocol. Using AF_INET
2025-01-04 10:51:42 Socket Buffers: R=[87380->87380] S=[87380->87380]
2025-01-04 10:51:42 Listening for incoming TCP connection on [AF_INET][undef]:1194
2025-01-04 10:51:42 TCPv4_SERVER link local (bound): [AF_INET][undef]:1194
2025-01-04 10:51:42 TCPv4_SERVER link remote: [AF_UNSPEC]
2025-01-04 10:51:42 MULTI: multi_init called, r=256 v=256
2025-01-04 10:51:42 IFCONFIG POOL IPv4: base=10.8.0.4 size=62
2025-01-04 10:51:42 IFCONFIG POOL LIST
2025-01-04 10:51:42 MULTI: TCP INIT maxclients=1024 maxevents=1029
2025-01-04 10:51:42 Initialization Sequence Completed

4. 设置 systemd 系统服务

编辑 systemd 配置文件: /usr/lib/systemd/system/openvpn.service

1
2
3
4
5
6
7
8
9
10
11
12
13
[Unit]
Description=OpenVPN service
After=network.target

[Service]
Type=simple
ExecStart=/usr/local/openvpn/sbin/openvpn --config /etc/openvpn/server.conf
#Restart=on-failure
Restart=always
RestartSec=3

[Install]
WantedBy=multi-user.target

现在就可以设置系统服务,并启动 Server。

1
2
systemctl enable --now  openvpn
systemctl status openvpn

将看到如下输出信息:

1
2
3
4
5
6
7
8
9
10
11
12
13
14
15
16
17
18
19
20
● openvpn.service - OpenVPN service
Loaded: loaded (/usr/lib/systemd/system/openvpn.service; enabled; preset: disabled)
Active: active (running) since Sat 2025-01-04 10:56:45 UTC; 3s ago
Main PID: 67546 (openvpn)
Tasks: 1 (limit: 4615)
Memory: 1.1M
CPU: 18ms
CGroup: /system.slice/openvpn.service
└─67546 /usr/local/openvpn/sbin/openvpn --config /usr/local/openvpn/server.conf

Jan 04 10:56:45 vultr.guest openvpn[67546]: 2025-01-04 10:56:45 Could not determine IPv4/IPv6 protocol. Using AF_INET
Jan 04 10:56:45 vultr.guest openvpn[67546]: 2025-01-04 10:56:45 Socket Buffers: R=[87380->87380] S=[87380->87380]
Jan 04 10:56:45 vultr.guest openvpn[67546]: 2025-01-04 10:56:45 Listening for incoming TCP connection on [AF_INET][unde>
Jan 04 10:56:45 vultr.guest openvpn[67546]: 2025-01-04 10:56:45 TCPv4_SERVER link local (bound): [AF_INET][undef]:1194
Jan 04 10:56:45 vultr.guest openvpn[67546]: 2025-01-04 10:56:45 TCPv4_SERVER link remote: [AF_UNSPEC]
Jan 04 10:56:45 vultr.guest openvpn[67546]: 2025-01-04 10:56:45 MULTI: multi_init called, r=256 v=256
Jan 04 10:56:45 vultr.guest openvpn[67546]: 2025-01-04 10:56:45 IFCONFIG POOL IPv4: base=10.8.0.4 size=62
Jan 04 10:56:45 vultr.guest openvpn[67546]: 2025-01-04 10:56:45 IFCONFIG POOL LIST
Jan 04 10:56:45 vultr.guest openvpn[67546]: 2025-01-04 10:56:45 MULTI: TCP INIT maxclients=1024 maxevents=1029
Jan 04 10:56:45 vultr.guest openvpn[67546]: 2025-01-04 10:56:45 Initialization Sequence Completed

进一步检查网络端口:

1
2
3
4
5
6
7
8
[root@vultr openvpn]# netstat -tunpl
Active Internet connections (only se:xrvers)
Proto Recv-Q Send-Q Local Address Foreign Address State PID/Program name
tcp 0 0 0.0.0.0:22 0.0.0.0:* LISTEN 1426/sshd: /usr/sbi
tcp 0 0 0.0.0.0:1194 0.0.0.0:* LISTEN 17191/openvpn
tcp6 0 0 :::22 :::* LISTEN 1426/sshd: /usr/sbi
udp 0 0 127.0.0.1:323 0.0.0.0:* 667/chronyd
udp6 0 0 ::1:323 :::* 667/chronyd

以后可以实时跟踪 openvpn 的滚动日志输出:

1
journalctl -u openvpn -f

五、启动 Client

不同客户端的配置文件有差别,但CA证书和ta证书是一致的,以 x-client 为例,需要以下操作:

1. 收集 Client 证书文件

客户端需要获得以下文件:

  • /usr/local/openvpn/easy-rsa/pki/private/x-client.key
  • /usr/local/openvpn/easy-rsa/pki/issued/x-client.crt
  • /etc/openvpn/server/ca.crt
  • /etc/openvpn/server/ta.key

2. 编辑 Client 配置文件

Client 的配置文件一般以.ovpn命名,例如x.ovpn,并与上面的证书文件放在同一目录下。

1
2
3
4
5
6
7
8
9
10
11
12
13
14
15
16
17
18
19
20
21
22
23
24
25
# 基础配置
client
dev tun
proto udp
remote <Server IP> 1194

resolv-retry infinite # 自动重新连接
nobind # 无需绑定本地特定端口
persist-key # 持久化
persist-tun

# 证书和密钥文件信息,在当前目录下
ca ca.crt
cert x-client.crt
key x-client.key

# 如果服务器使用 tls-auth 密钥,客户端也必须使用
remote-cert-tls server
tls-auth ta.key 1

# 指定传输数据的加密方式
cipher AES-256-CBC

# 日志级别
verb 3

3. 启动client

如果客户端是 centos,需要先完成 openvpn 的安装,但不需要 easy-rsa,然后命令行就可以启动

1
openvpn --config x.ovpn

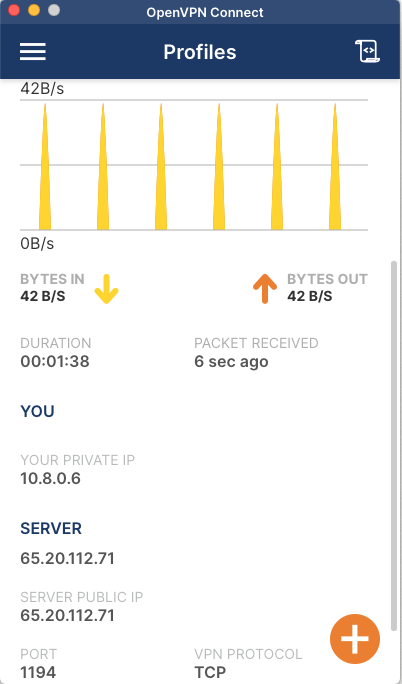
OpenVPN 开发了适配各种桌面系统的 UI,下载页面位于:https://openvpn.net/client/。

alt text

六、简要分析

1. Server启动后,客户端无法连接,或者几分钟后就无法连接

服务端配置应采用 udp 协议,性能更好,也是官方推荐方案!
在 TX 服务器上,必须手工配置系统防火墙,打开 1194 端口。
在 VL 服务器上,发现修改默认端口号就可以恢复连接!!!

2. 如何在客户端 OVPN 配置文件附加证书和密钥文件

1
2
3
4
5
6
7
8
9
10
11
12
13
14
15
16
17
18
# 服务端的 CA 证书,CERTIFICATE 段落
<ca>
<\ca>

# 某一客户端的私钥文件数据,PRIVATE KEY 段落
<key>
<\key>

# 某一客户端的证书文件数据,仅需 CERTIFICATE 段落即可!
<cert>
<\cert>

;tls-auth ta.key 1 # 不再需要,改成下一行直接添加
key-direction 1

# 服务端的 ta.key 文件,OpenVPN Static key v1 段落
<tls-auth>
<\tls-auth>

附录一:easy-rsa 配置文件

easy-rsa 的配置样本位于:/usr/share/doc/easy-rsa/vars.example,默认的就够用!

1
2
3
4
5
6
7
8
9
10
11
12
13
14
15
16
# 发布者的组织信息,无所谓
#set_var EASYRSA_REQ_COUNTRY "US"
#set_var EASYRSA_REQ_PROVINCE "California"
#set_var EASYRSA_REQ_CITY "San Francisco"
#set_var EASYRSA_REQ_ORG "Copyleft Certificate Co"
#set_var EASYRSA_REQ_EMAIL "me@example.net"
#set_var EASYRSA_REQ_OU "My Organizational Unit"

# CA证书的有效期,默认为10年
#set_var EASYRSA_CA_EXPIRE 3650

# 服务器证书的有效期,默认为2年半
#set_var EASYRSA_CERT_EXPIRE 825

# 证书注销列表(CRL)的发布间隔,默认为半年
#set_var EASYRSA_CRL_DAYS 180

附录二:关于 CRL 注销证书

OpenVPN 服务器与 VPN 客户端之间的身份验证, 主要是通过证书来进行的。有时我们需要禁止某个用户连接 VPN 服务器,则将其证书注销即可。

生成 CRL 注销证书

1
2
./vars
./easyrsa gen-crl

处理信息如下:

1
2
3
4
5
6
7
8
9
10
11
12
13
14
15
16
Using Easy-RSA 'vars' configuration:
* /usr/local/openvpn/easy-rsa/vars

IMPORTANT:
The preferred location for 'vars' is within the PKI folder.
To silence this message move your 'vars' file to your PKI
or declare your 'vars' file with option: --vars=<FILE>

Using SSL:
* openssl OpenSSL 3.2.2 4 Jun 2024 (Library: OpenSSL 3.2.2 4 Jun 2024)
Using configuration from /usr/local/openvpn/easy-rsa/pki/openssl-easyrsa.cnf

Notice
------
An updated CRL has been created:
* /usr/local/openvpn/easy-rsa/pki/crl.pem
注销某个 x-client 证书

1
2
. ./vars
./revoke-full x-client

执行后会在keys\目录生成一个crl.pem 文件,这个文件中包含了注销证书的名单。
将该文件复制到 OpenVPN 服务器可以访问的目录(例如 ssl),然后就可以启用 CRL 验证。

crl-verify /usr/local/openvpn/ssl/crl.pem

最后,重启服务即可生效。

附录三:TinyProxy 代理服务

  • 安装软件包
1
yum install -y tinyproxy
  • 编辑配置文件 /etc/tinyproxy/tinyproxy.conf
1
2
3
4
port 8866
# Allow 127.0.0.1
# Allow ::1
DisableViaHeader Yes
  • 启动系统服务
1
2
systemctl enable --now tinyproxy
systemctl status tinyproxy

附录四: OPVN 配置文件生成脚本

OpenWrt 环境下运行本脚本,可以生成带证书信息的 OVPN 客户端配置文件。

1
2
3
4
5
6
7
8
9
10
11
12
13
14
15
16
17
18
19
20
21
22
23
24
25
26
27
28
29
30
31
32
33
34
35
36
37
38
39
40
41
42
43
44
45
46
47
48
49
# Fetch WAN IP address
source /lib/functions/network.sh
network_find_wan NET_IF
network_get_ipaddr VPN_SERV "${NET_IF}"

# Fetch FQDN from DDNS client
VPN_FQDN="$(uci -q get "$(uci -q show ddns \
| sed -n -e "/\.enabled='1'$/s//.lookup_host/p" \
| sed -n -e "1p")")"
if [ -n "${VPN_FQDN}" ]
then
VPN_SERV="${VPN_FQDN}"
fi

# Configuration parameters
VPN_CONF="/etc/openvpn/vpnserver.conf"
VPN_PORT="$(sed -n -e "/^port\s/s///p" "${VPN_CONF}")"
VPN_PROTO="$(sed -n -e "/^proto\s/s///p" "${VPN_CONF}")"
VPN_DEV="$(sed -n -e "/^dev\s/s///p" "${VPN_CONF}")"
EASYRSA_PKI="/etc/easy-rsa/pki"
TC_KEY="$(sed -e "/^#/d;/^\w/N;s/\n//" "${EASYRSA_PKI}/tc.pem")"
CA_CERT="$(openssl x509 -in "${EASYRSA_PKI}/ca.crt")"
NL=$'\n'

# Generate VPN client profiles
grep -l -r -e "TLS Web Client Authentication" "${EASYRSA_PKI}/issued" \
| sed -e "s/^.*\///;s/\.\w*$//" \
| while read VPN_ID
do
VPN_CONF="/etc/openvpn/${VPN_ID}.ovpn"
VPN_CERT="$(openssl x509 -in "${EASYRSA_PKI}/issued/${VPN_ID}.crt")"
VPN_KEY="$(cat "${EASYRSA_PKI}/private/${VPN_ID}.key")"
cat << EOF > "${VPN_CONF}"
verb 3
dev ${VPN_DEV%%[0-9]*}
nobind
client
remote ${VPN_SERV} ${VPN_PORT} ${VPN_PROTO}
auth-nocache
remote-cert-tls server
<tls-crypt>${NL}${TC_KEY}${NL}</tls-crypt>
<ca>${NL}${CA_CERT}${NL}</ca>
<cert>${NL}${VPN_CERT}${NL}</cert>
<key>${NL}${VPN_KEY}${NL}</key>
EOF
chmod "u=rw,g=,o=" "${VPN_CONF}"
done

ls /etc/openvpn/*.ovpn

参考文献

官方文档